Photographing the Milky Way, Part 1

The core of the Milky Way in the early evening outside Colorado Springs.
It's summertime, and it’s Milky Way season. Well you can see the Milky Way all year, but the best time to view the core of the Milky Way is June to August, when the core is visible most of the night after sunset.
The best way to see and photograph the Milky Way is on the night of the New Moon, or a couple of days before and after, and at a place away from light pollution ( Check out one of the maps on line to find a location away from lights, like https://www.nps.gov/subjects/nightskies/night-sky-maps.htm ).
If you are planning to photograph the Milky Way, you obviously want a clear cloudless night, although some clouds are ok, as you can see with my photo above.
Unfortunately the night of the New Moon this July in Colorado Springs was covered in clouds, as was the days before and the day after. Finally on the third day after the New Moon, the clouds cleared for a bit to take a few photos. I didn’t drive up to the mountains since there was more clouds there.
So this month we headed east by the Paint Mines Interpretive Park and set up in a field just east of the park. The Paint Mines are a great place to photograph and have the spires and hoodoos in your foreground. A permit and fee are required, check out https://epc-assets.elpasoco.com/wp-content/uploads/sites/10/Paint-Mines-Commercial-Astro-Photography.pdf for details.
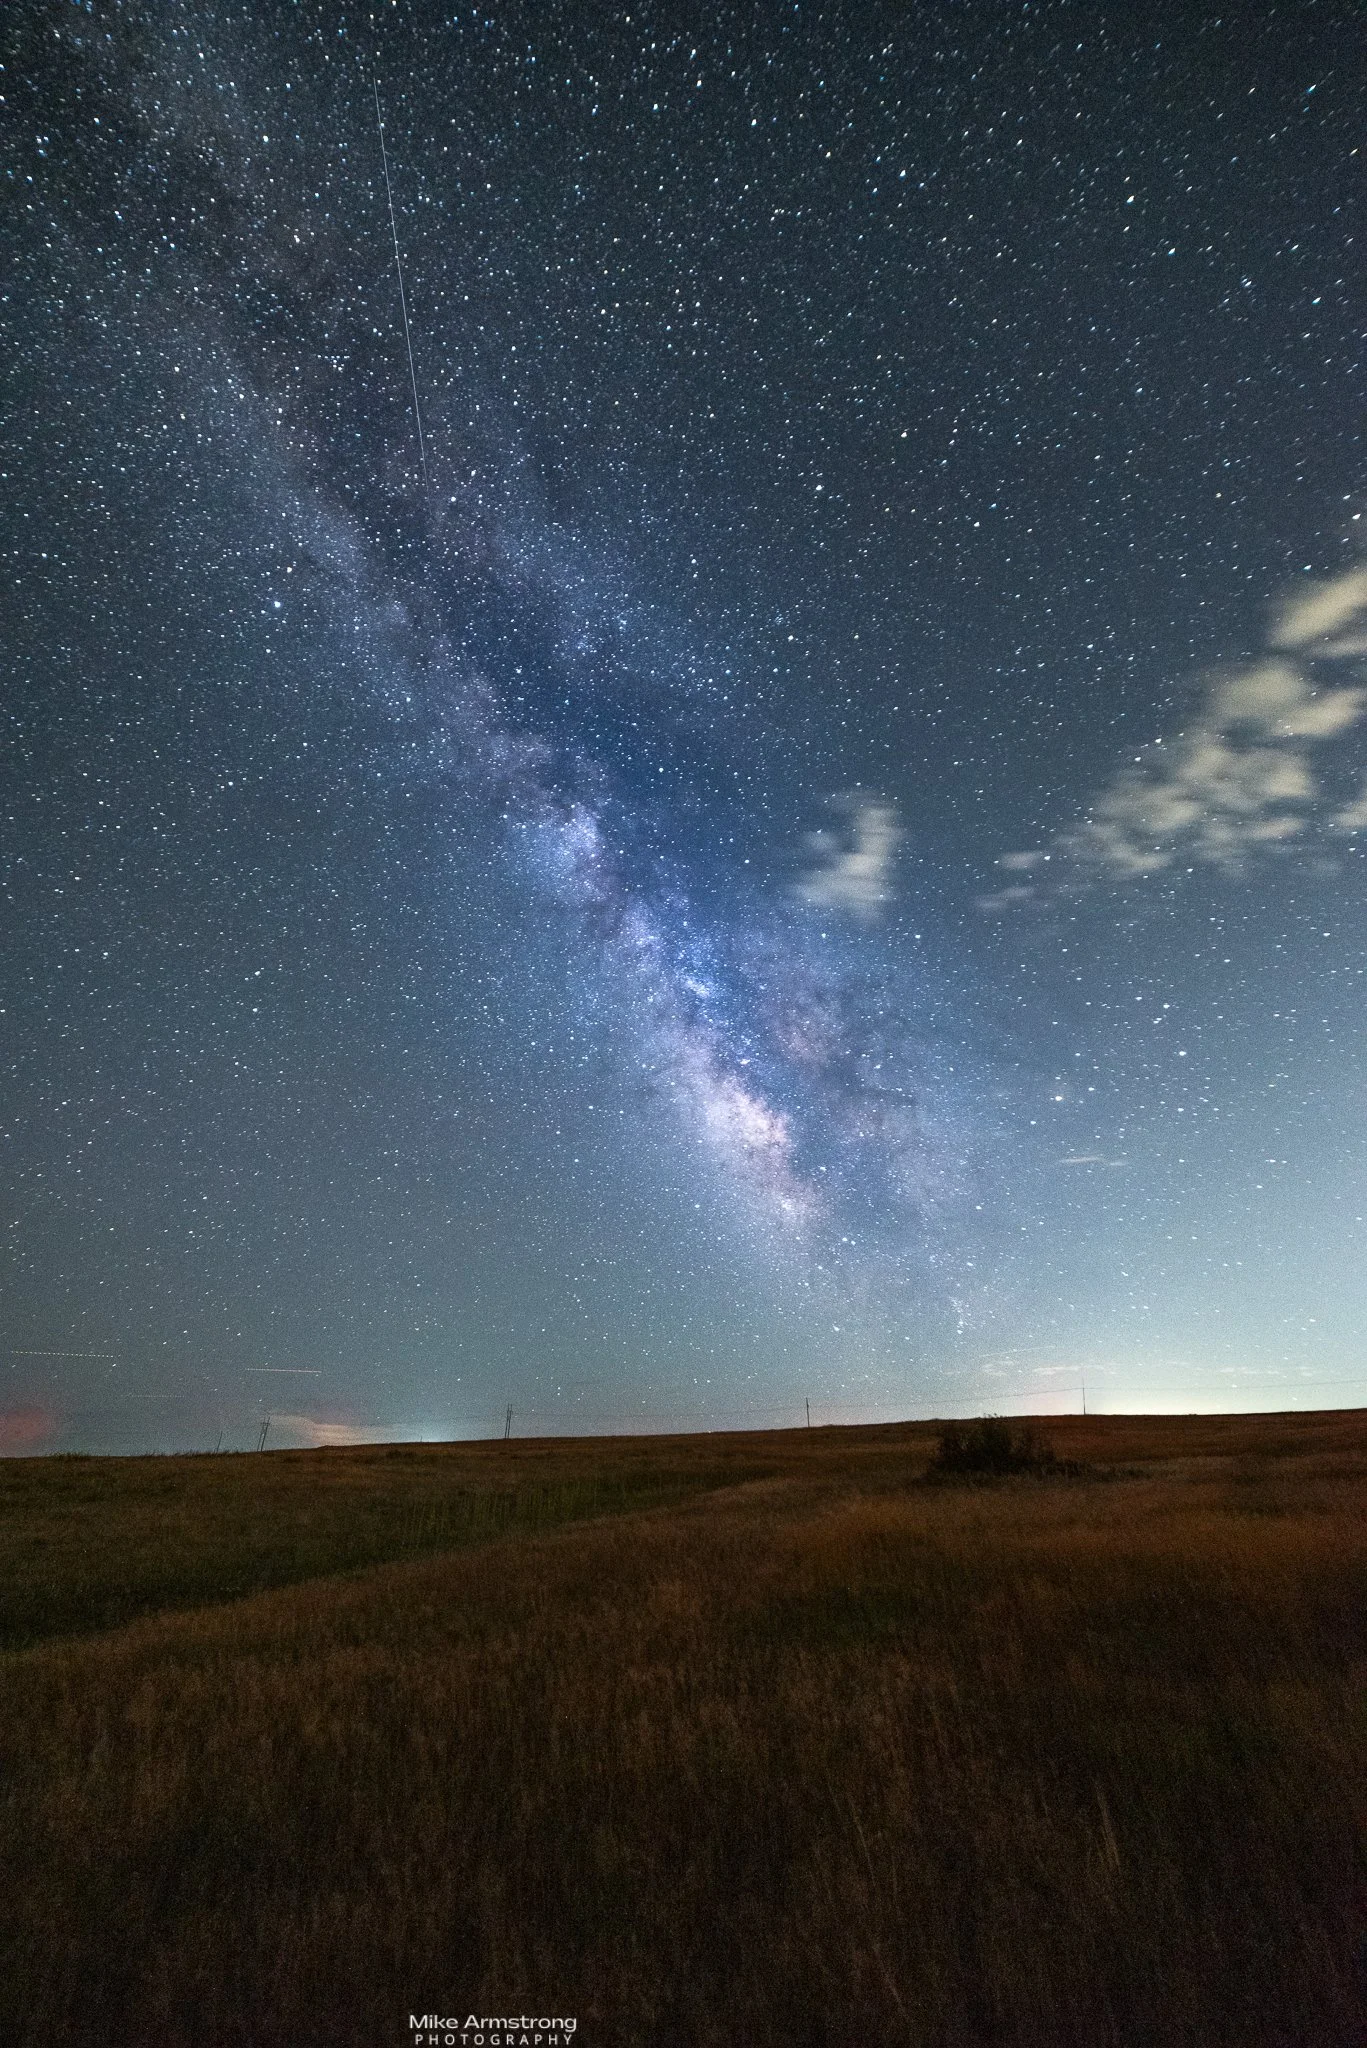
One of my 12 photos I took then stacked with Sequator - shot at f2.8 | 14mm | 30 sec | ISO 3200
Above is a single photo of the 12 I took in a row, as you can see, there are some airplane and satellite trails and the stars are a shifting a bit.
A zoomed in image below shows more of the details of the trails and shifting stars.

Closer look at star shifting and satellite and planes
To clean up the satellite and plane trails and align the stars, I use the free Windows program Sequator.

Details on how to use it and the download are here.
So here is a short list of steps that I have been using for my Milky Way Photos:
Select a nice clear night during the New Moon, I use the app, PhotoPils to help with this
Find a location with cool things to put in your foreground, an old barn, mountains, or a seascape
Get your composition and focus on a bright star, and take a few test shots.
Set your camera to take 10 to 15 shots in succession to be used as your sky shot and stacked with Sequator
Re-focus on the foreground, and take a longer exposure photo of the foreground.
OK I know there are a lot of questions and details needed for each of these steps. There are dozens or more YouTube videos covering these, so I am not going to go into the detains.
However here are my general camera settings and gear I have used:
I use a Nikon D810 camera with a Rokinon 14mm f2.8 lens. This lens in inexpensive and a good one to use if you are just starting.
I use a AODELAN Intervalometer wireless timer/shutter release to take the 12 photos and for the long exposure of the foreground. I have bee surprised with how well it has been working, you can find it on Amazon (of course!)
Here is a list of recommended camera settings:
Use a camera that can be set in Manual Mode. A DSLR or Mirrorless camera are perfect, with a delay timer, or attach a remote trigger. Remember that do not need a super expensive camera to photograph the Milky Way.
Use a sturdy tripod!
Use the 500 rule to determine your shutter speed. Divide the focal length of the lens by 500 for a full frame camera, to get the exposure in seconds. For example 500/20 = 25 seconds. For a crop sensor camera, use the 300 rule.
Set the image quality to RAW format, this will give you the ability to edit in Adobe Photoshop and Lightroom.
Lower the LCD monitor brightness to -2 or so, this helps you to view in the dark.
Set the aperture to the largest setting that your lens has, such as 2.8 or better.
Turn off Auto ISO, and manually set it to 1600 to start with. Take some test shots to see what looks best. If needed you can increase the ISO to 3200, and up to 6400.
Set the White Balance between 3800K to 4000K. If your camera does not allow you to set a specific Kelvin (K) number, you can set it to Daylight.
Turn off settings like Long Exposure Noise Reduction, High ISO Noise Reduction, Lens and in body stabilization.
Below is my final image after stacking and a little editing in Lightroom Classic.
I will have more on the post processing of Milky Way photos in my next post.
Enjoy!!

Image after stacked and a bit of editing